Products
Solutions
Resources
9977 N 90th Street, Suite 250 Scottsdale, AZ 85258 | 1-800-637-7496
© 2024 InEight, Inc. All Rights Reserved | Privacy Statement | Terms of Service | Cookie Policy | Do not sell/share my information

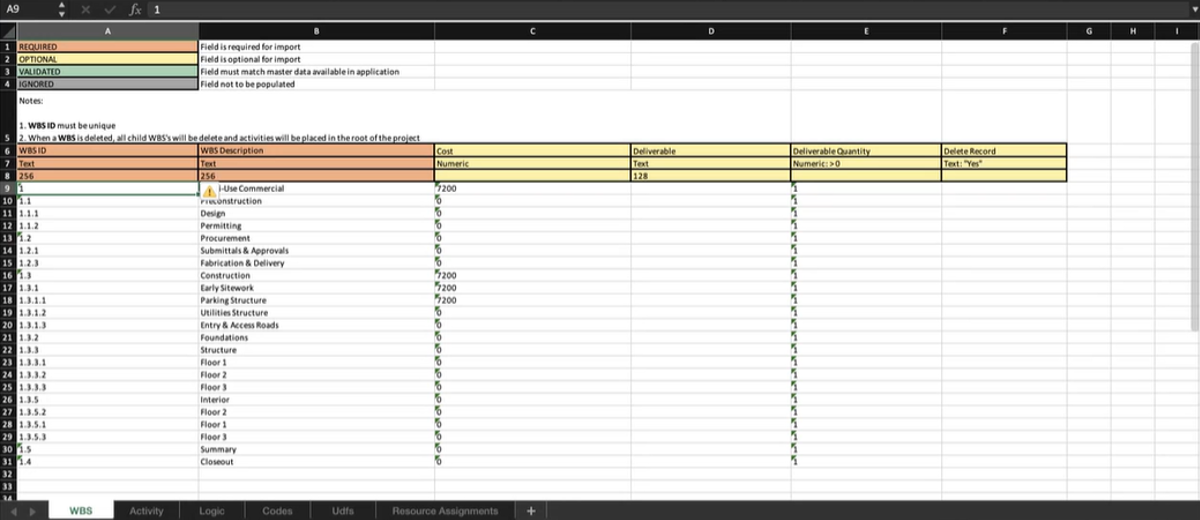
The Excel export feature lets you use the exported project file for reporting since it is a flat data source.
When you export from Schedule, the data from the entire project is exported including the following tabs:
WBS
Activity
Logic
Codes
Udfs
Resource Assignments
Each tab provides information that can be built upon each other. This lets you pivot on different data to create slicers for your reports. The Excel export also lets you make bulk edits to a schedule. You can build an entire schedule in Excel and then import it back into Schedule. This includes logic, resource assignments, and the WBS. Each tab contains the following fields:
Required
Optional
Validated
Ignored
When considering what to import back into a Schedule project, you have the option to delete some tabs and import in only the specific tabs that were changed.
If there are no changes to the file imported back into a Schedule project, the import shows no changes have been made.
Use the following step by step to export a Schedule project.
Select the Export button on the right of the screen.
The Resources Building dialog box is shown
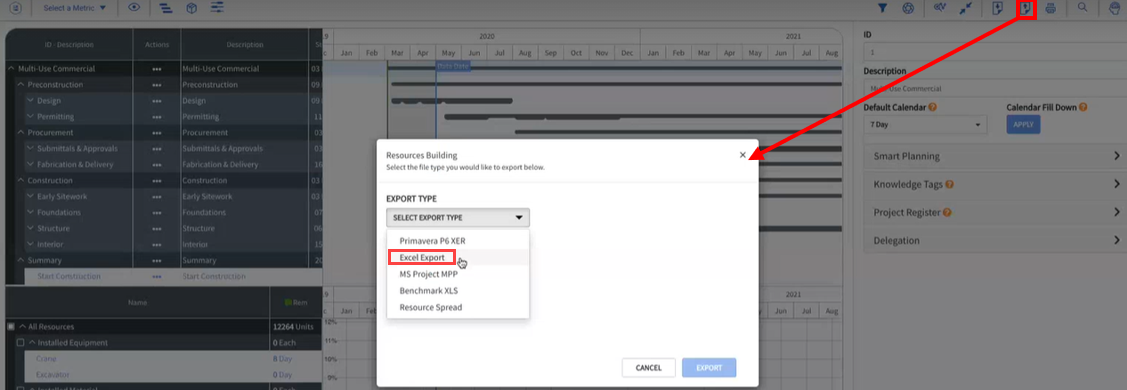
Select the Export Type drop-down menu.
Select Excel Export, and then select Export
An Excel project file opens
Use the following step by step to import an Excel file into a Schedule project.
From Schedule, select the Import button on the right of the screen.
Browse to the file you want to import back into Schedule.
Select Import.
An error message can be shown during the Import process. This error message can show where an error occurred in the Excel template and where the fix needs to be made. The import still brings in the data that is correct, but it skips over the data that generated the error. The error is then logged in Schedule.
Additional Information
9977 N 90th Street, Suite 250 Scottsdale, AZ 85258 | 1-800-637-7496
© 2024 InEight, Inc. All Rights Reserved | Privacy Statement | Terms of Service | Cookie Policy | Do not sell/share my information